How to Draw an Ant Step-by-Step
Learning how to draw an ant can be a fun and easy way to practice drawing skills. Ants have simple anatomy but adding small details brings them to life. Follow this step-by-step drawing tutorial to learn how to draw an ant.
How to Draw an Ant
Drawing an ant is simple once you understand their basic anatomy. An ant has three main body parts — the head, thorax, and abdomen. The head contains the eyes, mouthparts, and antennae. The thorax has the legs and wings attached. The abdomen is the largest section. Using basic shapes for each section and adding small details like legs and antennae will create a realistic looking ant.
Gather Drawing Supplies
To draw an ant you just need a pencil, paper, and an eraser. You may also want coloring supplies like crayons, colored pencils, or markers to add color when complete.
- Plain white paper or drawing paper — Drawing an ant is easiest on smooth paper. Avoid lined paper.
- №2 Pencil — Use a sharpened no.2 pencil for the initial sketch. Softer pencils can smudge easily.
- Kneaded Eraser — A kneaded eraser allows you to gently erase mistakes without damaging the paper.
- Coloring Supplies (optional) — Crayons, colored pencils, or markers allow you to add color after completing your ant drawing.
Draw the Basic Ant Shape
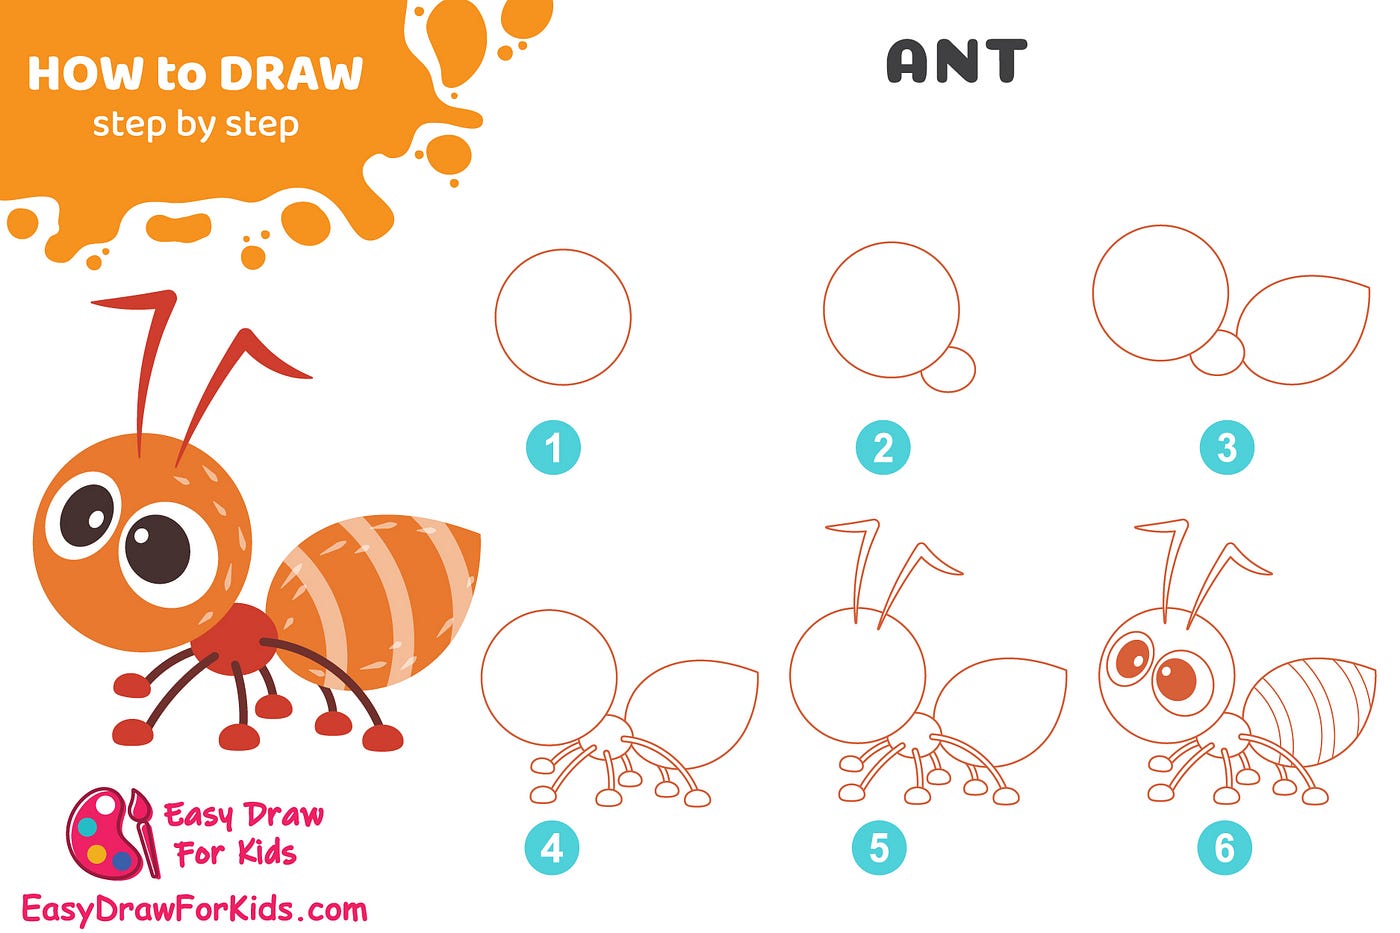
An ant has three distinct body sections. Start by drawing basic shapes for each part.
- Head — Draw a small oval shape for the head.
- Thorax — Add an oval shape twice as large as the head connected to it.
- Abdomen — Draw a large oval shape about 3 times the size of the head.
Position the head and thorax near the top with the large abdomen section on the bottom.
Add the Head Details
The ant’s head contains the most small details. Add the following parts:
- Eyes — Draw two small oval shapes on either side of the head.
- Mouth — Under the eyes add a small line for the mouthparts.
- Antennae — Draw two lines extending up from the top of the head. These will become the antennae.
Position the elements based on ant photos or diagrams. Leave space between them.
Add the Legs and Other Details
The legs and other details will bring your ant drawing to life:
- Legs — Draw six separate legs extending from the thorax oval.
- Wings — If desired, add two small oval shapes on the upper back.
- Abdomen — Consider drawing segmented lines across the abdomen.
- Antennae — Add line segments to the antennae lines for more detail.
Position the legs bent at different angles for interest. Wings are optional for different types of ants.
Conclusion
With some basic shapes and added details, you can create a fun drawing of an ant. Pay close attention to photo references for help with proportions and placement of anatomy. Take your time and remember you can always erase and refine. The more you practice drawing ants and other insects, the more realistic they will become. Once your ant drawing is finished, consider adding color or trying a whole colony!
